The Web-GIS can be installed on local servers or on Amazon Web Services (AWS) linux instances. The installation procedures are the same on the local server and on AWS. Only the type of connection to the server is different and depends on the platform chosen by the user.
...
We have two options : Amazon or local instance.
| Amazon instance | Local instance |
|---|---|
|
|


Once connected, you will have a message like the following figure shows. In this case, you can continue to the next step.
...
To insall the Geoserver, you need to download GeoServer Binary. You can find the latest version of GeoServer at the GeoServer Download page. At the time of writing, the latest version is 2.9.2. Under the Maintenance Distributions section, you click the version 2.9.2, then you copy the link of the "Web Archived".
...
PostGIS provides a “shp2pgsql” tool to convert ESRI shape files into SQL suitable for insertion into PostGIS/PostgreSQL database.For that, you nedd to prepare you directory.
Preparation:
You connect to your AWS Linux instance or localhost.
You extract "slm_data.tgz" located in the "installer/slm_data" directory.
...
- In your web browser, navigate to http://54.171.74.139/geoserver/
- Login to GeoServer. For this installation, the credentials are:
...
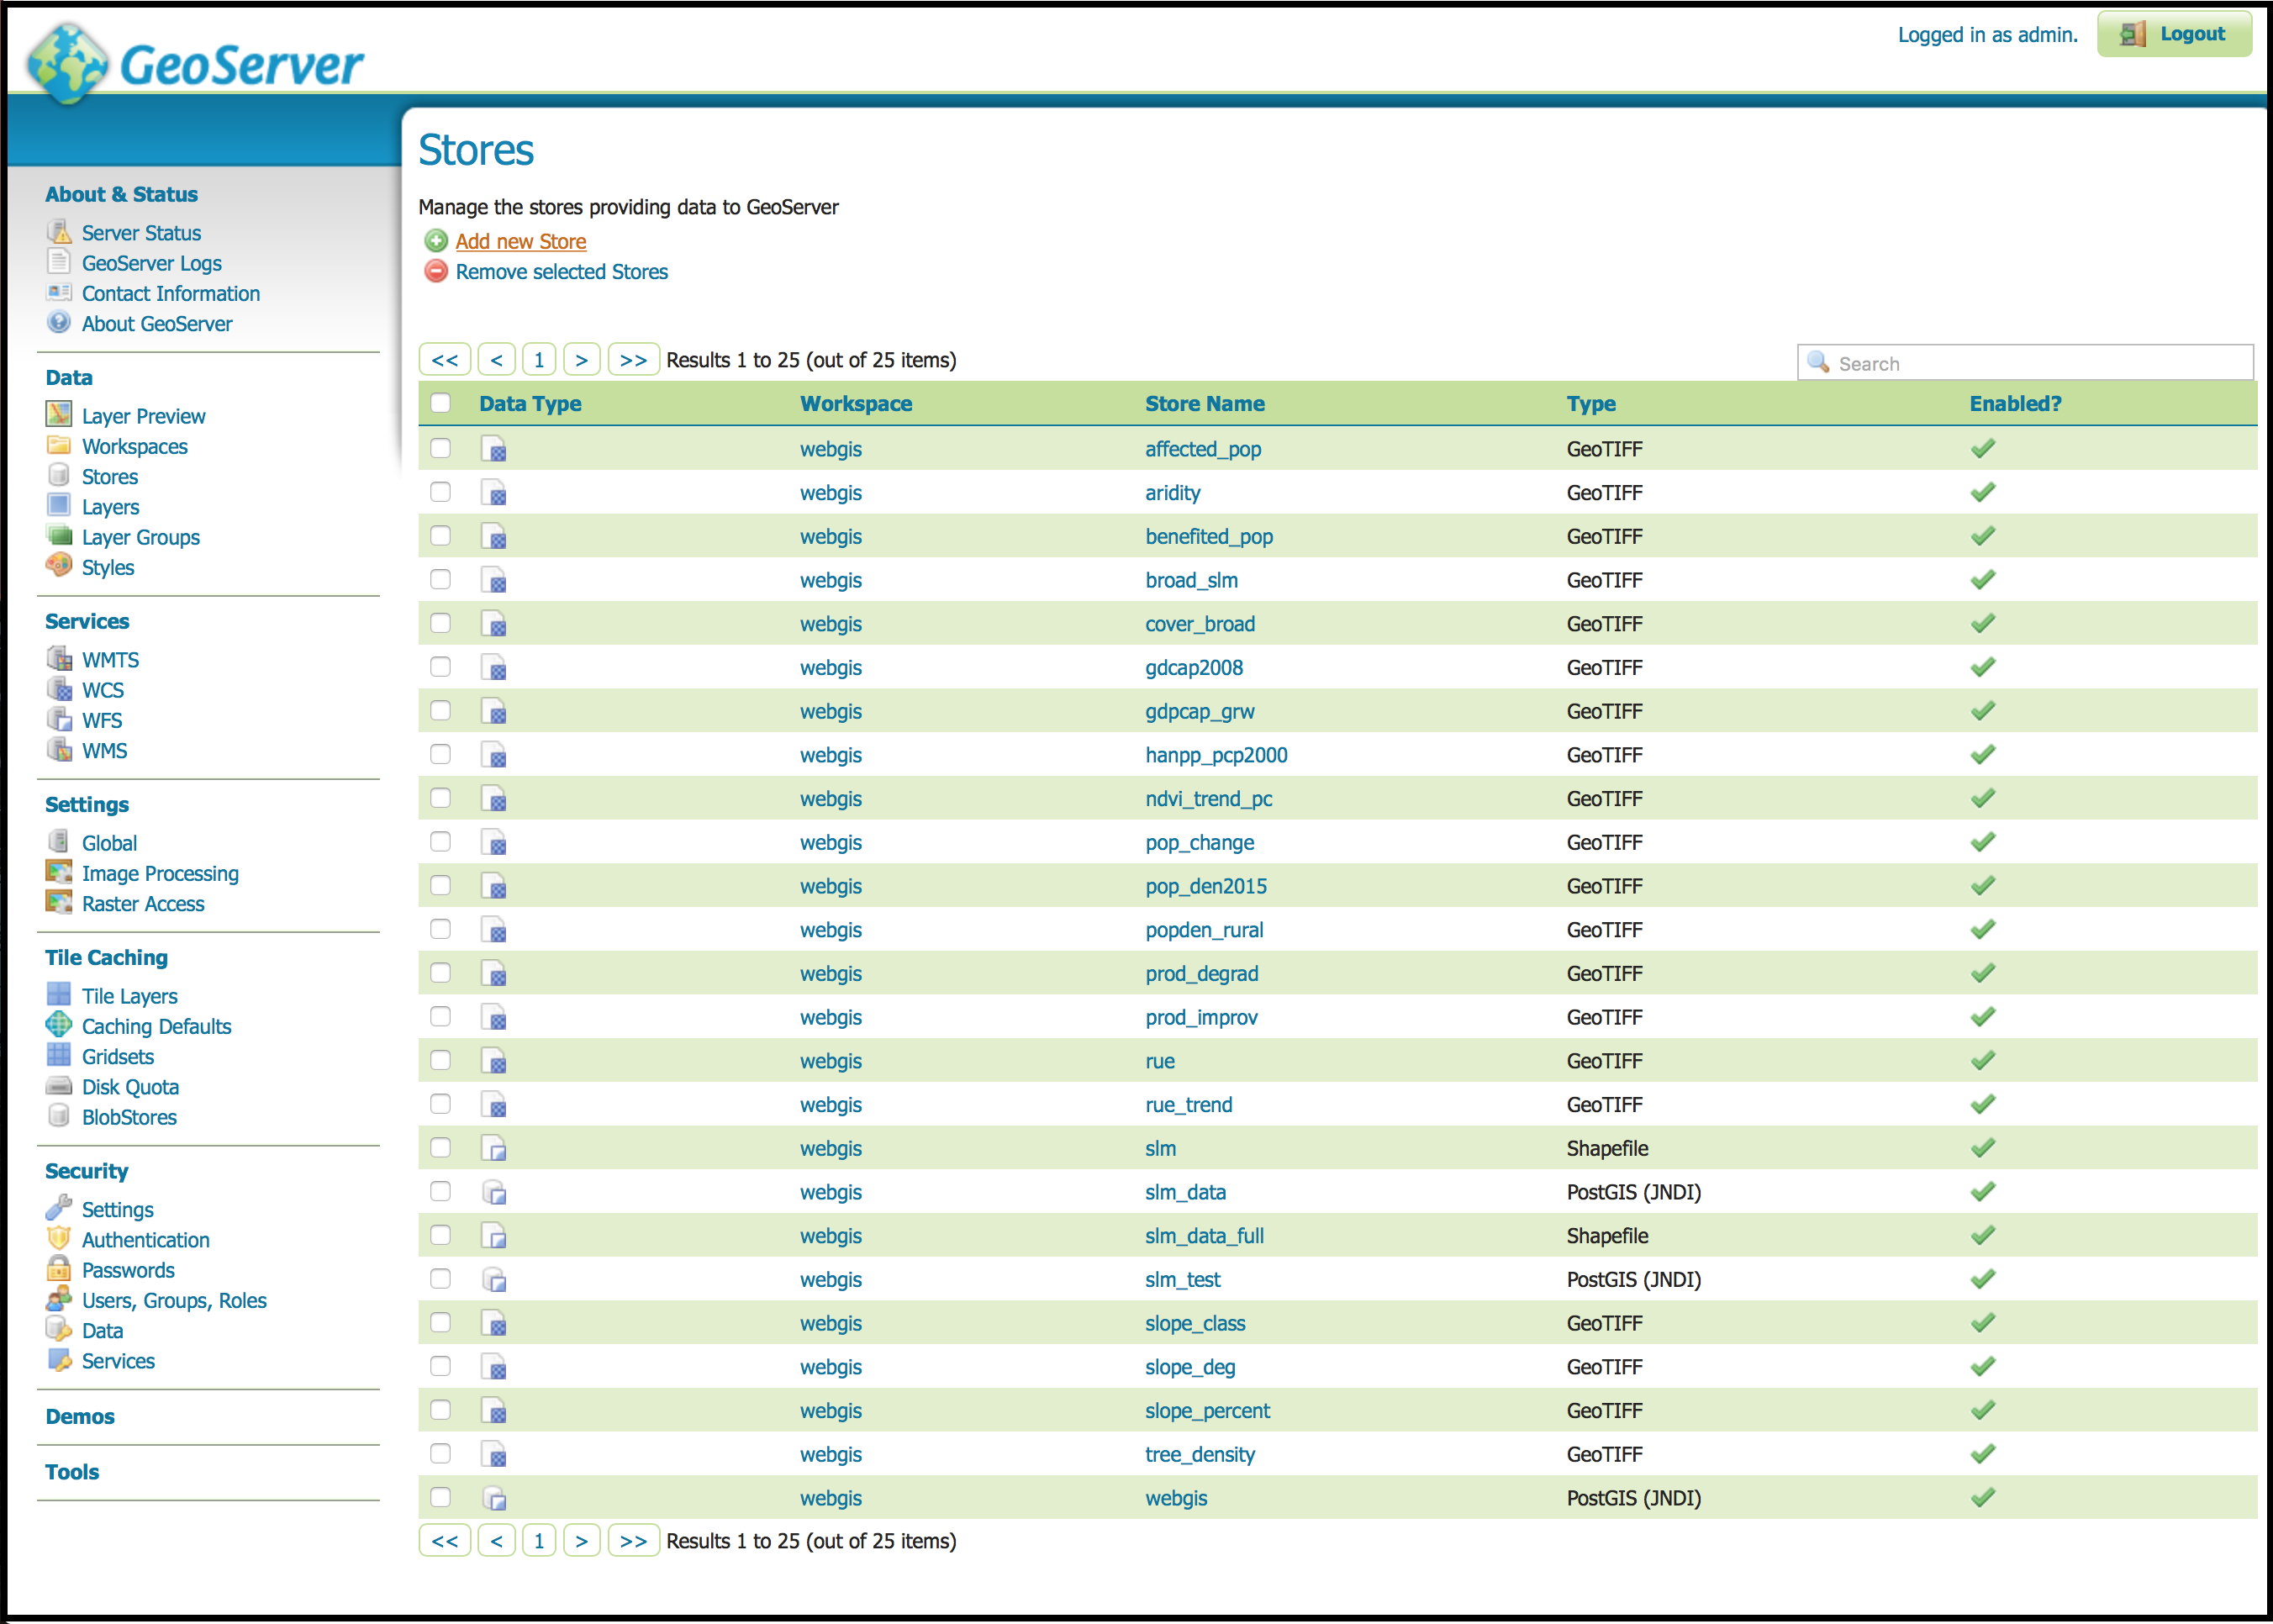
- You navigate to "Stores" ->Add "new Store"
...
This is not clear
- You select “PostGIS (JNDI)”.
...
You navigate to Stores ->Add new Store.

...
You select “GeoTIFF”.
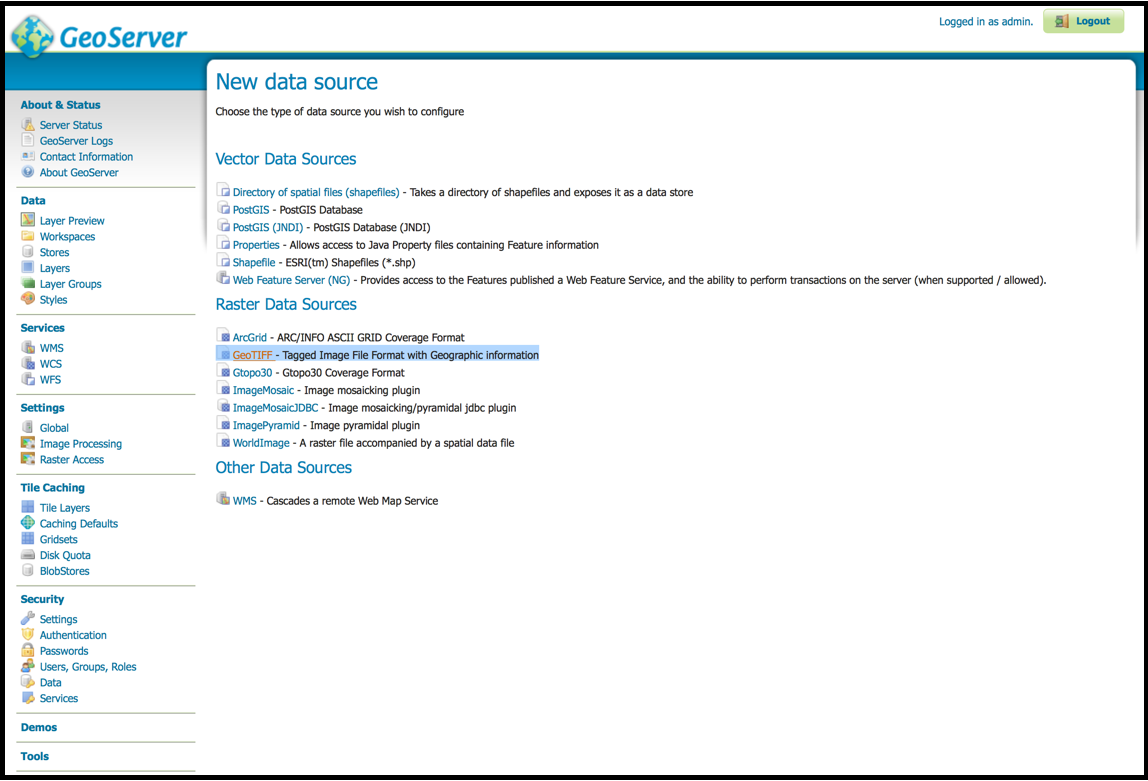
In the "Add Raster DataSource", you fill in basic store info and connection parameters.
...
You change the name to “tree_density”. Click Add button to add Composing coverages/bands to Output bands to be created.
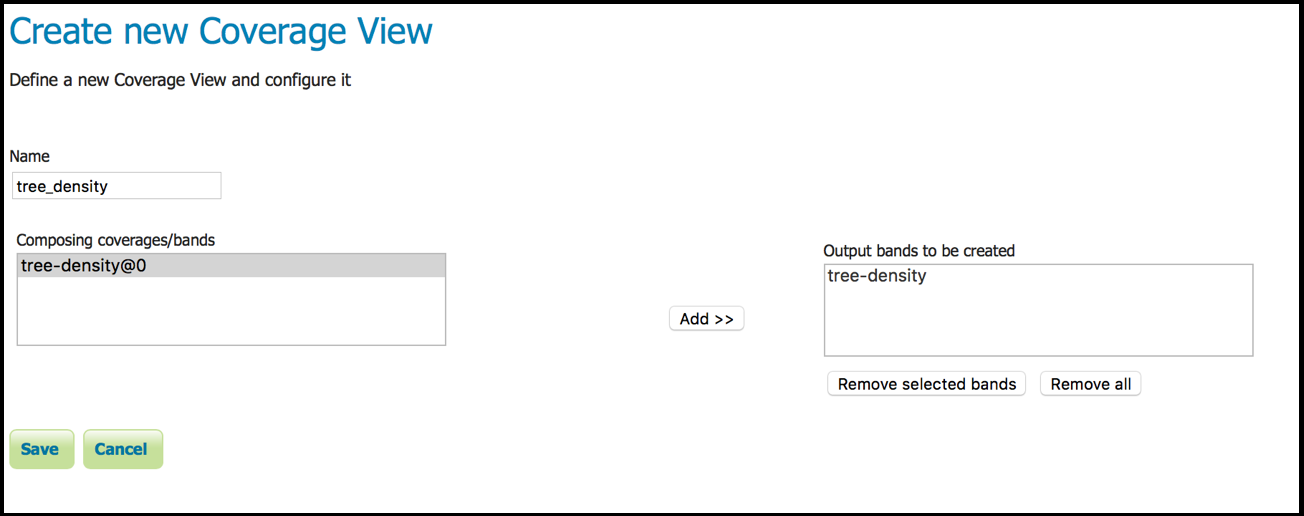
You click Save.
You edit the Layer page defines the data and publishing parameters for a layer. Forthat, you process in 5 steps:
...
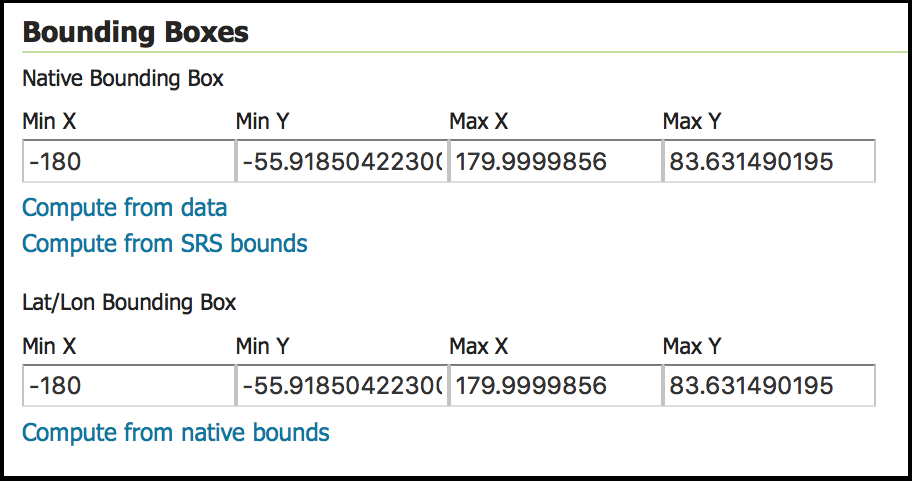
You generate the layer’s bounding boxes by clicking the Compute form data and then Compute from native bounds links.
- You click the Publishing tab at the top of the page.
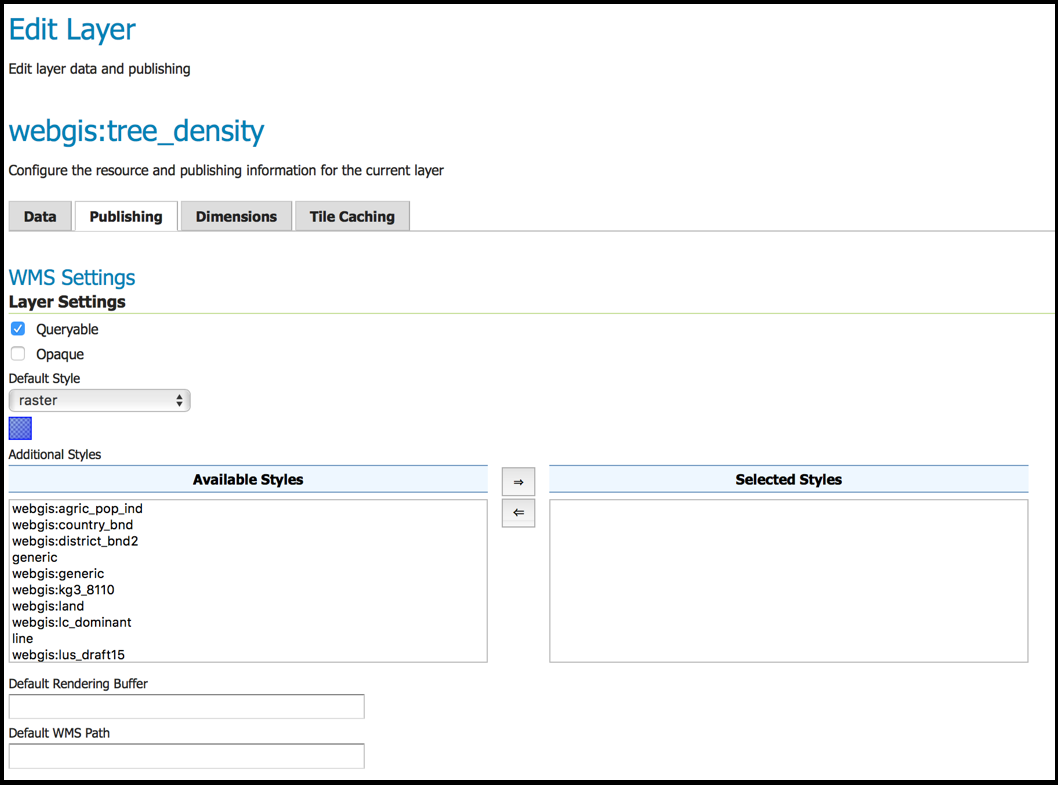
- In the WMS Settings, you tick Queryable and you leave the default style to raster. Next section, we are going to create a style for this layer
- You finalize the layer configuration by scrolling to the bottom of the page and clicking Save.
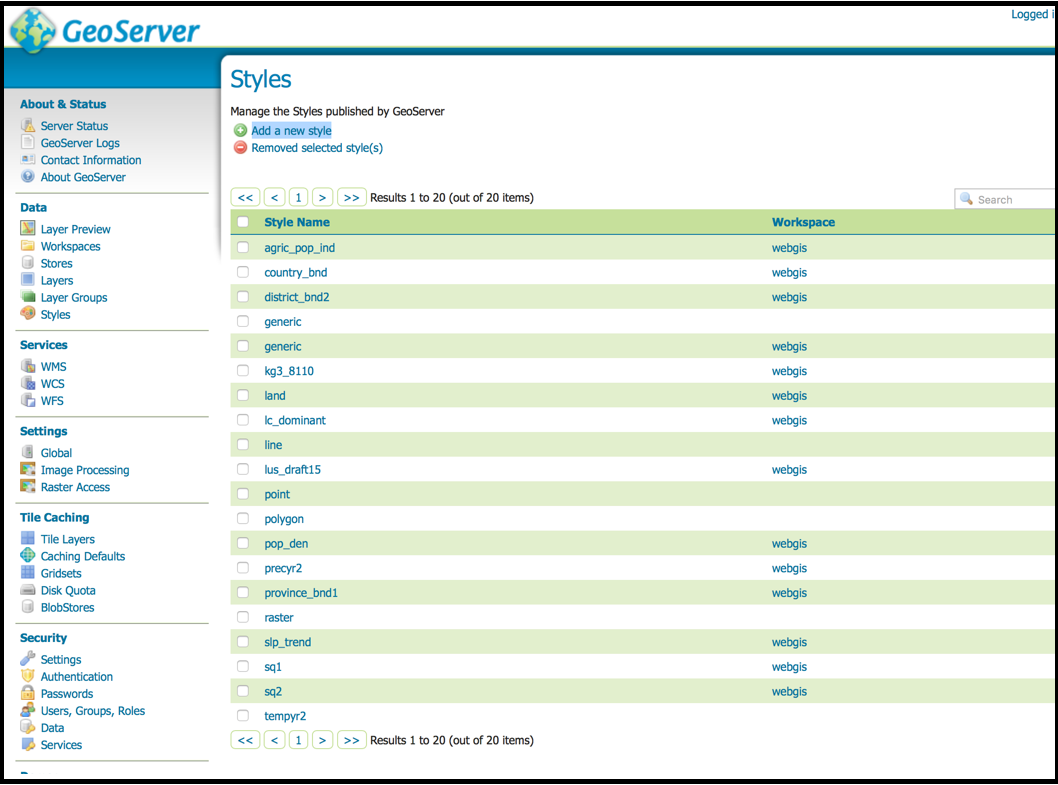
You create SLD Style
You navigate to "Styles" → "Add a new style".
- You scroll to the bottom and click “Choose File”.
...
- In the Default Style, select the style name “webgis:tree_density_tif_style” and click Save.
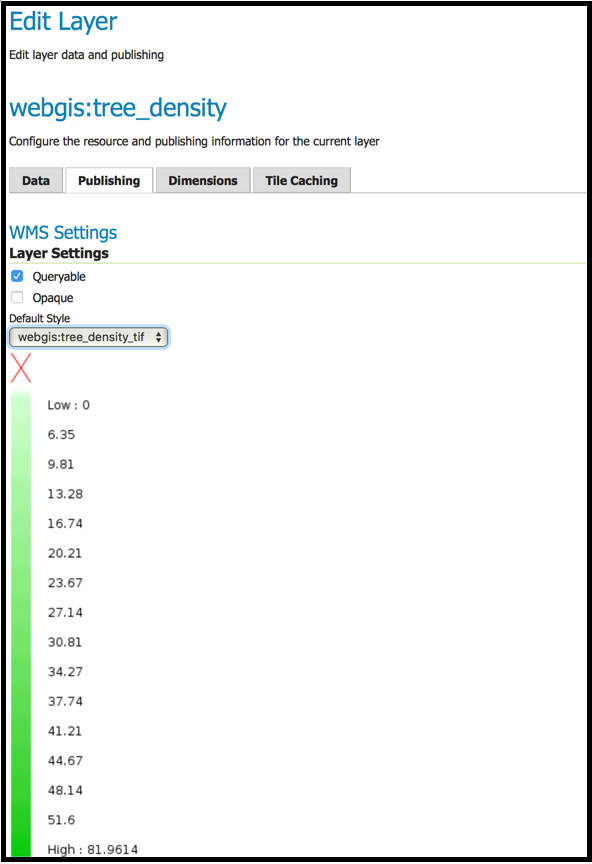
- You preview the Layer.
In order to verify that the tree_density layer is published correctly, you can preview the layer by:
Clicking on the Layer "Preview" in the left side menu.
In the Layer "Preview" screen, you find tree_density layer.
...
- If you wish to publish another raster, you have to repeat the whole process.
Conceptual Infrastructure Design
Web-GIS is using the following operating system, and software versions:
...