Project Media
- Enrico Bonaiuti
The fourth step of the project edit. It is where all the project's media aspects are stored.

The user can upload a logo, a header image for the site, and up to four additional images to customize the project's open website.
State:
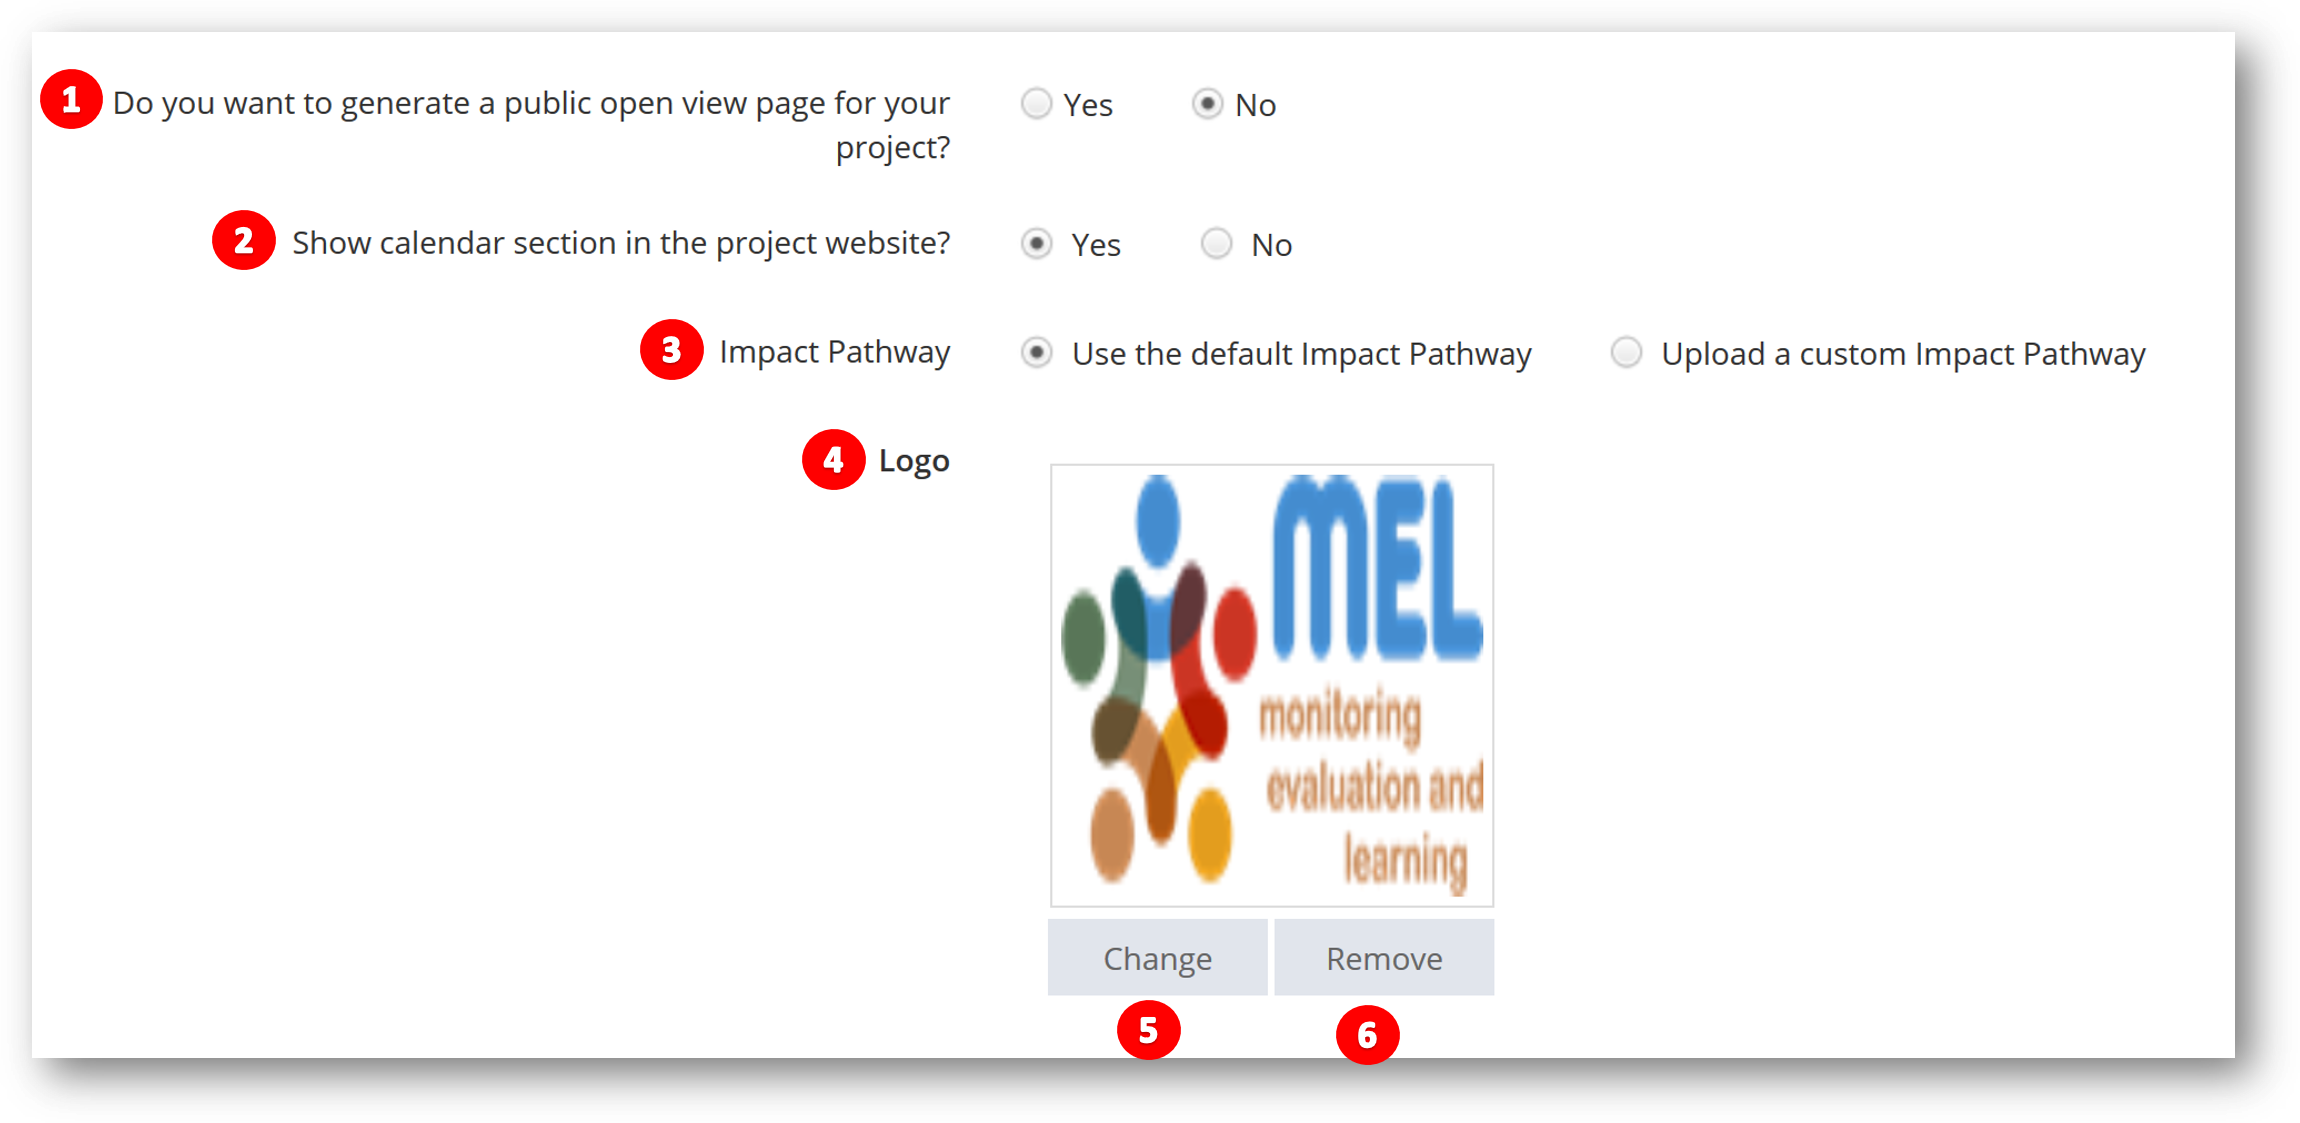
- If you want to generate a public open view page for your project or not (1).
- If you want to show the calendar section in the project's website or not (2).
- If you want to use the default impact pathway which is generated from project manage section or upload a custom impact pathway (3).
Add your project logo (4). Click on “Change” (5) to change the logo, or “Remove” (6) to remove the added logo.
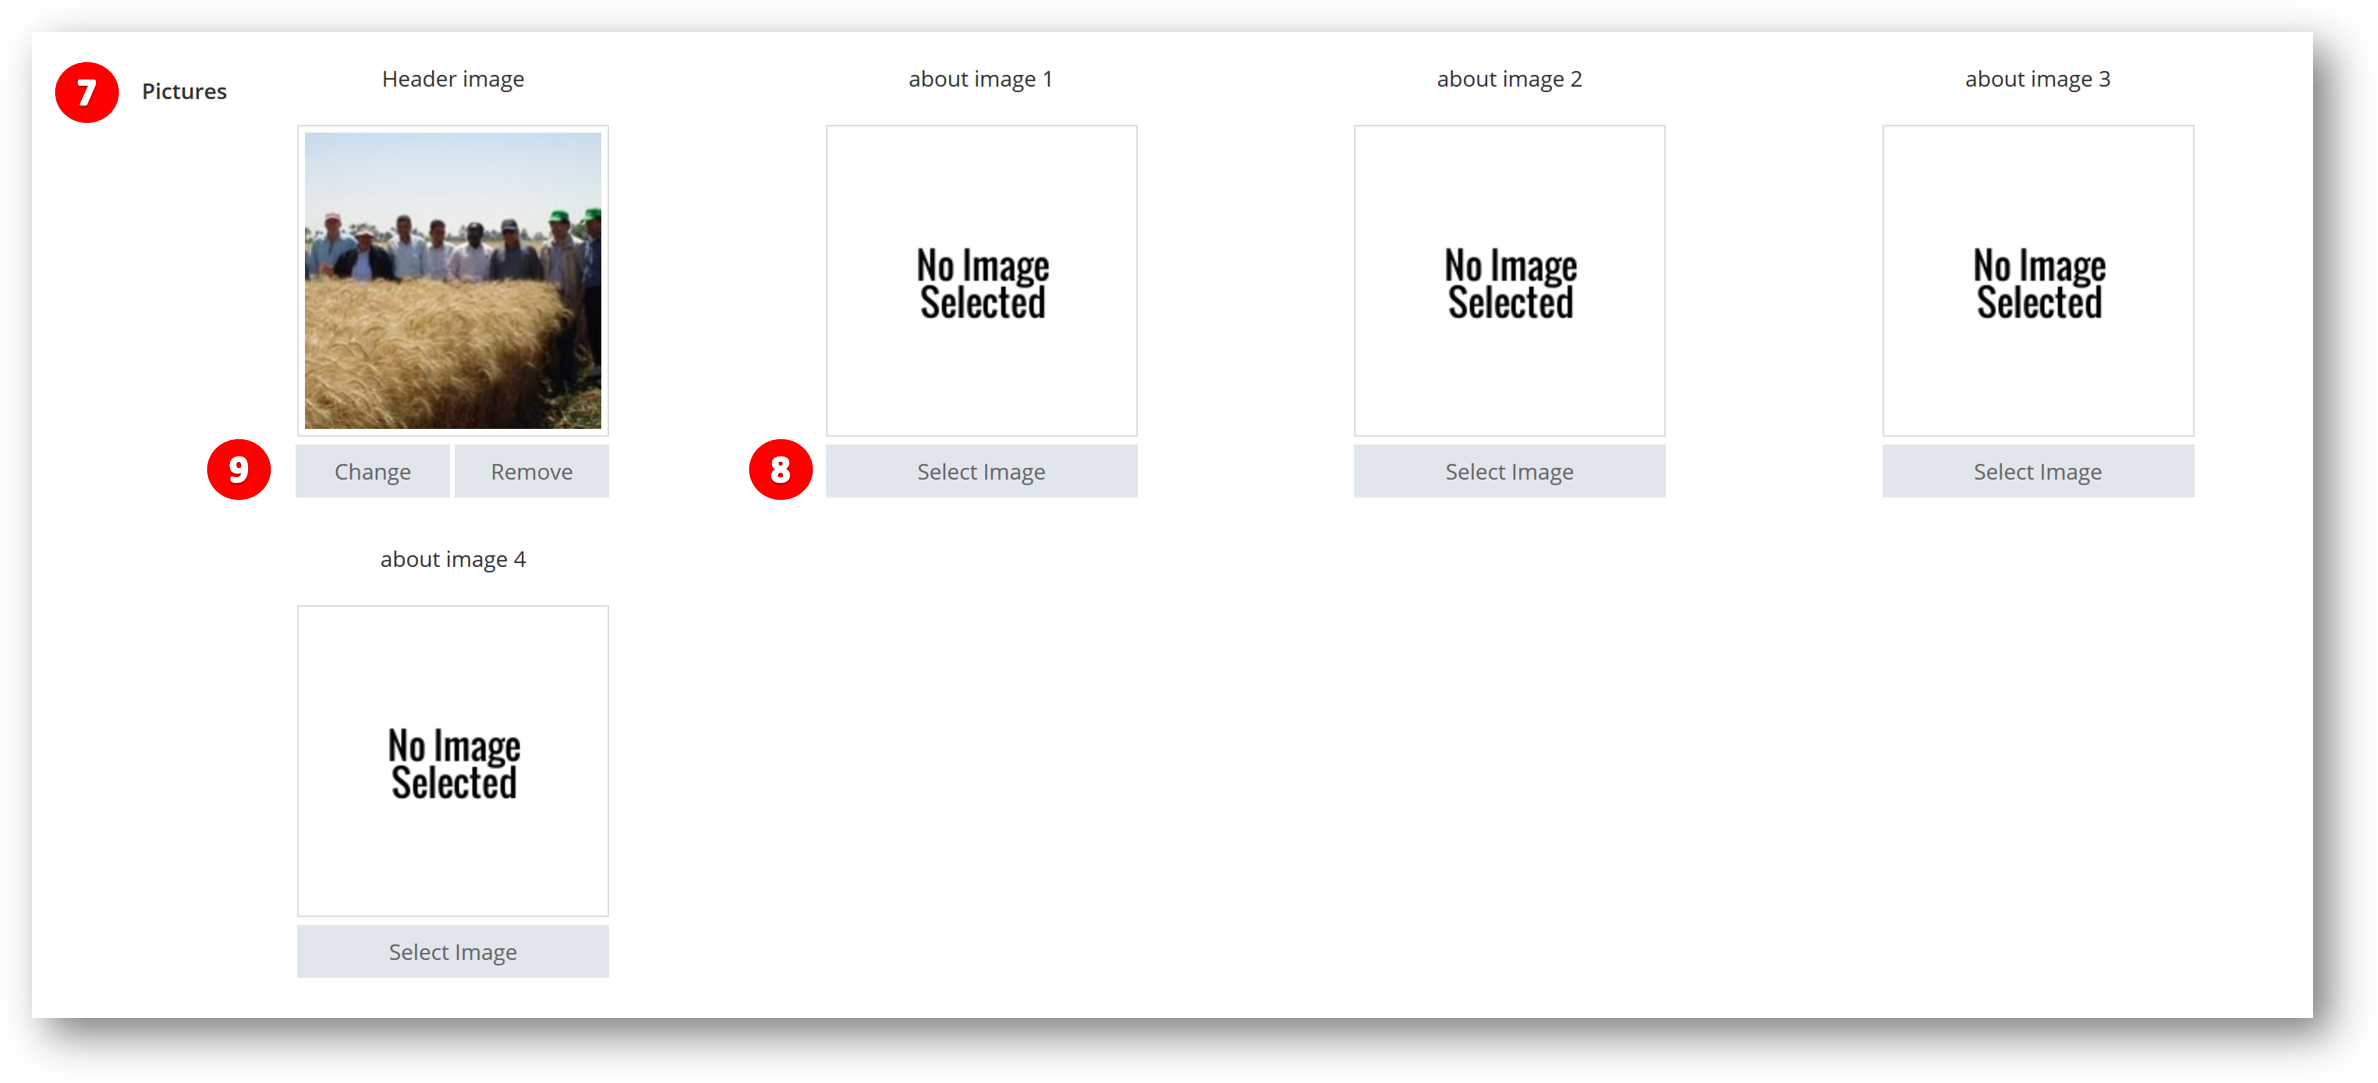
Add your project pictures (7) by clicking on "Select Image" (8) and upload the desired image, or Change/Remove your uploaded image by clicking on "Change/Remove" (9).
To add an image from your computer:
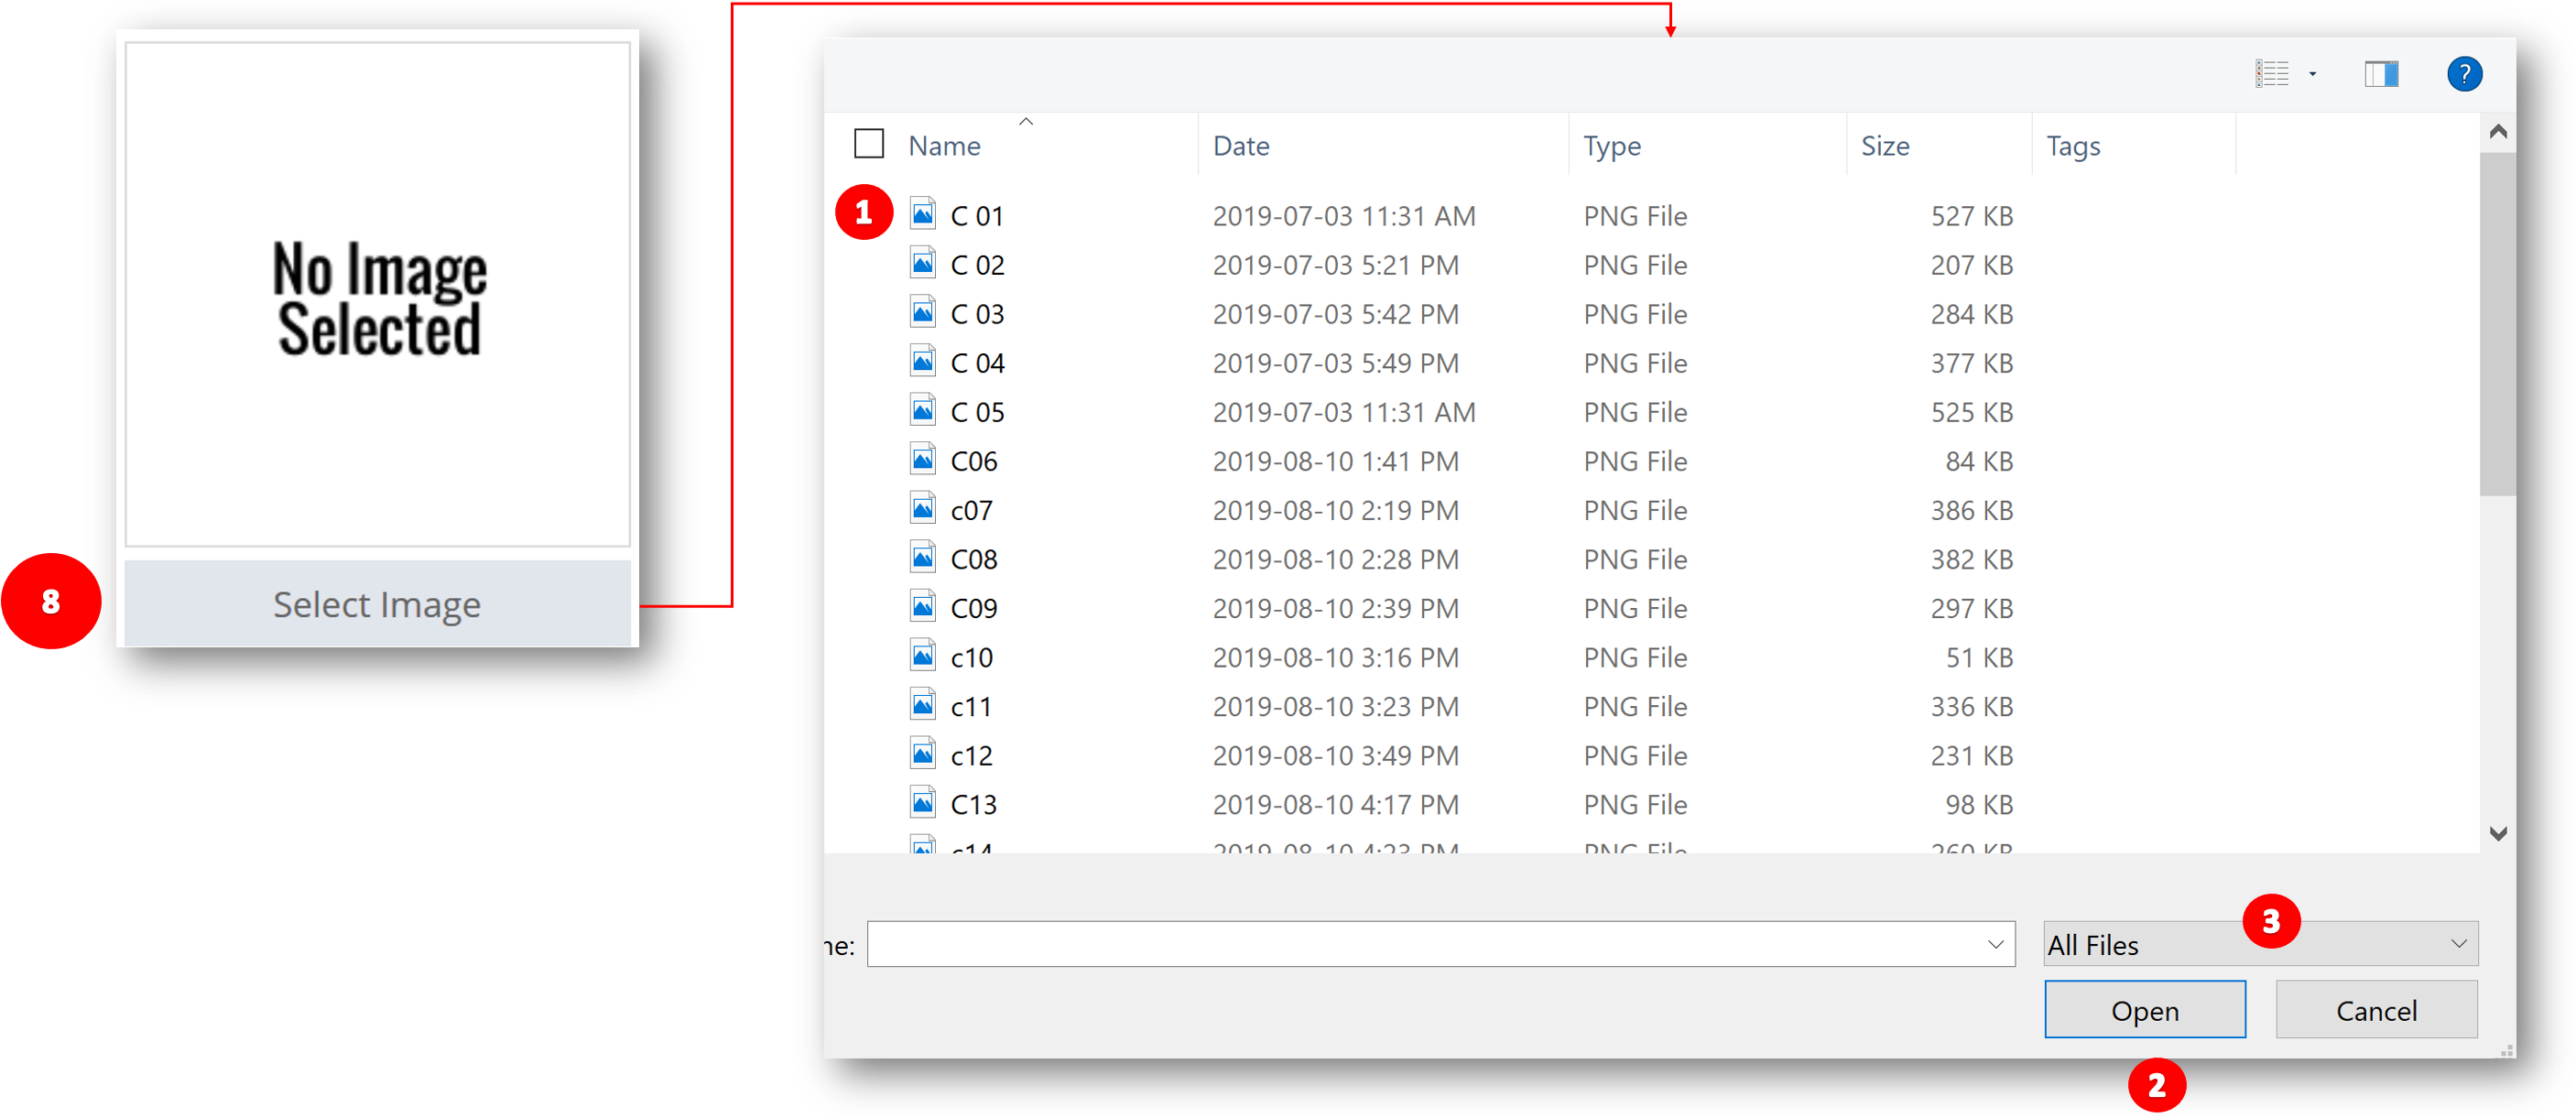
- Click on “Select Image” (8)
- Select the desired images from your computer (1) and
- Click on “Open” (2) and the image will be uploaded.
![]() If you cannot see your added images, choose “All Files” (3) to see all the files saved under that specific folder.
If you cannot see your added images, choose “All Files” (3) to see all the files saved under that specific folder.
![]() In case you can’t find pictures to upload in this sections, visit your institution image repository (e.g. ICARDA’s Flickr page:https://www.flickr.com/photos/47730240@N05/, click on the lens on the right ‘Search photo stream’ (1) and type a keyword for the project (2)).
In case you can’t find pictures to upload in this sections, visit your institution image repository (e.g. ICARDA’s Flickr page:https://www.flickr.com/photos/47730240@N05/, click on the lens on the right ‘Search photo stream’ (1) and type a keyword for the project (2)).

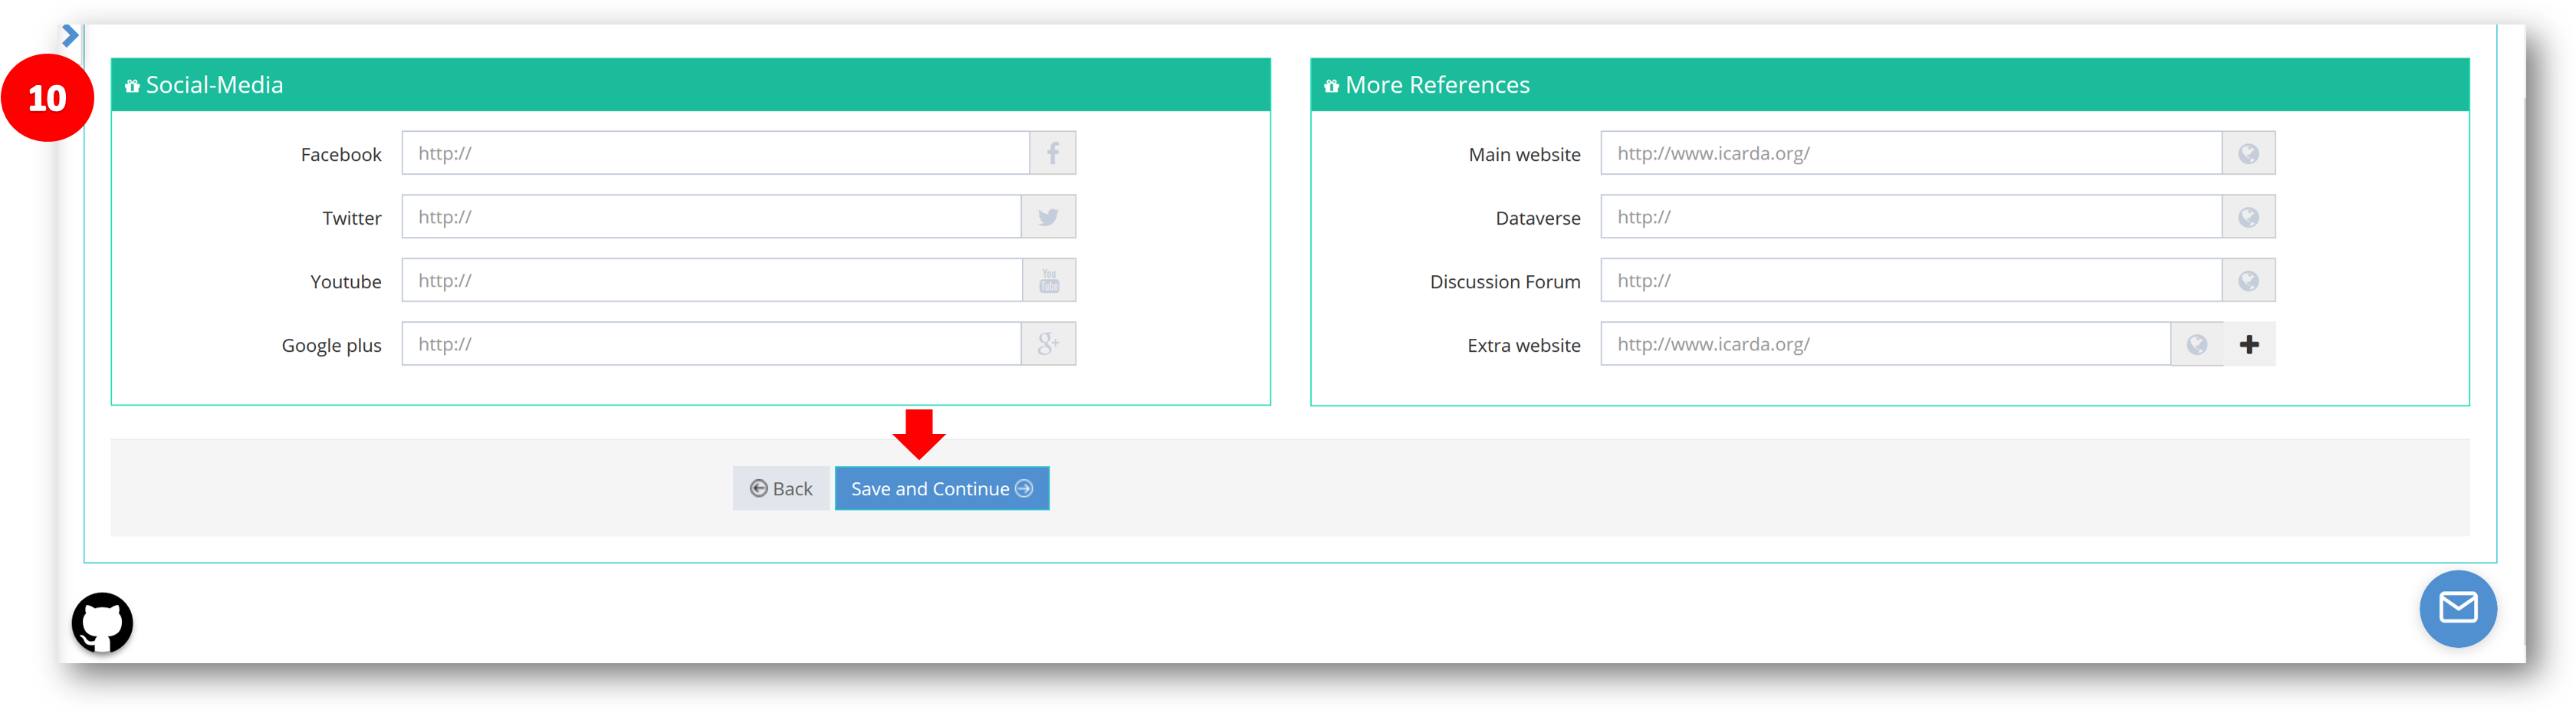
Add project links (10) to social media platforms such as Facebook, Twitter, YouTube, Main website etc… and click on “Save and Continue” to proceed to "Key Documents", or go "Back" to "Location".